 To
make sure your characters are positioned right and have a correct
size we use a template with a
grid. You need to print the template and then use a marker to
draw the characters the way you normally write. Do not use ball point
pens as the output will be too thin. Make sure you don't draw your
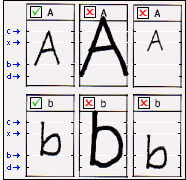
characters outside the cells. The cells have four horizontal marks on
both left and right side, that represent the cap height (C), x-height
(x), the baseline (b) and the descender (d). These can be used as
guidelines. The image on the right illustrates how to get the best
results.
To
make sure your characters are positioned right and have a correct
size we use a template with a
grid. You need to print the template and then use a marker to
draw the characters the way you normally write. Do not use ball point
pens as the output will be too thin. Make sure you don't draw your
characters outside the cells. The cells have four horizontal marks on
both left and right side, that represent the cap height (C), x-height
(x), the baseline (b) and the descender (d). These can be used as
guidelines. The image on the right illustrates how to get the best
results.Add additional characters and symbols like § and β as well as your signature in the cells in the last rows. You can also use those cells to rewrite characters in case you messed them up. Take as much time as is needed to complete the whole character set.
 Put the original
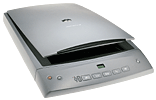
drawing as straight as possible on the scanner platen.
Scan the completed template as high-resolution (300 or 600 dpi) bitmap.
Scan in grayscale and if possible save the bitmap in BMP or GIF format; this preserves the edges of the letters while
keeping the file size low.
Put the original
drawing as straight as possible on the scanner platen.
Scan the completed template as high-resolution (300 or 600 dpi) bitmap.
Scan in grayscale and if possible save the bitmap in BMP or GIF format; this preserves the edges of the letters while
keeping the file size low.While the scanner is processing, you might think about a name for your font. Usually your last name will do, but maybe you can come up with another (more creative) name.
[continue with step 2]

